
While blocked sender alerts are configured automatically in Microsoft 365, you can modify the configuration in the Microsoft 365 Defender portal. To configure the alerts, follow these steps:
- Navigate to the Microsoft 365 Defender portal (https://securtiy.microsoft.com), expand Email & collaboration, select Policies & rules, and then select Alert policy.
- Locate the User restricted from sending email alert.
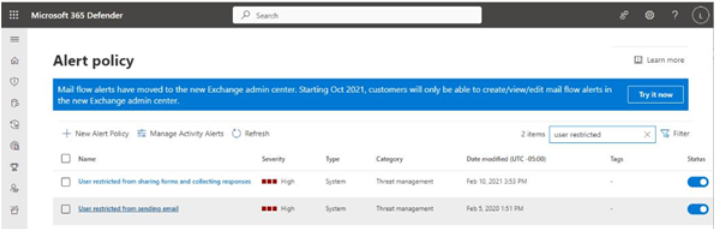
Figure 8.31 – Locating the alert policy
- Click Edit policy.
- On the Set your recipients page, under Email recipients, enter any additional recipients who should receive notifications for blocked senders. Click Next.
- On the Review your settings page, click Submit.
Depending on how your organization handles alerting and actions, it may be advisable to add a recipient for the service desk ticketing system.
Removing Restrictions
To investigate blocked users, you can use the Microsoft 365 Defender Restricted Entitiespage (https://security.microsoft.com/restrictedentities) or navigate to the Microsoft 365 Defender portal (https://security.microsoft.com), expand Email & collaboration, select Review, and then select Restricted entities.
To unblock a user, follow these steps:
- Navigate to the Microsoft 365 Defender portal (https://security.microsoft.com), expand Email & collaboration, select Review, and then select Restricted entities.
- Locate the mailbox to unblock.
- Select the checkbox next to the user’s name and then select the Unblock action.
- On the Unblock user flyout, review the details and recommendations. When ready, click Next.
- On the Unblock user page, specify whether you want to enforce MFA or reset the user’s password. When ready, click Submit.
- Click Yes to confirm.
The user should be able to send emails shortly.
Summary
In this chapter, you learned about the advanced email protection features of Microsoft Defender for Office 365, including Safe Links and Safe Attachments, and how to use threat management tools such as Explorer to investigate and remediate risks. You also learned about the education component, Attack simulation training.
In the next chapter, you’ll continue learning about the Microsoft Defender platform by exploring Defender for Endpoint.
Exam Readiness Drill – Chapter Review Questions
Benchmark Score: 75%
Apart from a solid understanding of key concepts, being able to think quickly under time pressure is a skill that will help you ace your certification exam. That’s why, working on these skills early on in your learning journey is key.
Chapter review questions are designed to improve your test-taking skills progressively with each chapter you learn and review your understanding of key concepts in the chapter at the same time. You’ll find these at the end of each chapter.
Before You Proceed
You need to unlock these resources before you start using them. Unlocking takes less than 10 minutes, can be done from any device, and needs to be done only once. Head over to the start of Chapter 7, Managing Security Reports and Alerts by Using the Microsoft 365 Defender Portal in this book for instructions on how to unlock them.
To open the Chapter Review Questions for this chapter, click the following link:
https://packt.link/MS102E1_CH08. Or, you can scan the following QR code:

Figure 8.32 – QR code that opens Chapter Review Questions for logged-in users
Once you login, you’ll see a page similar to what is shown in Figure 8.33:
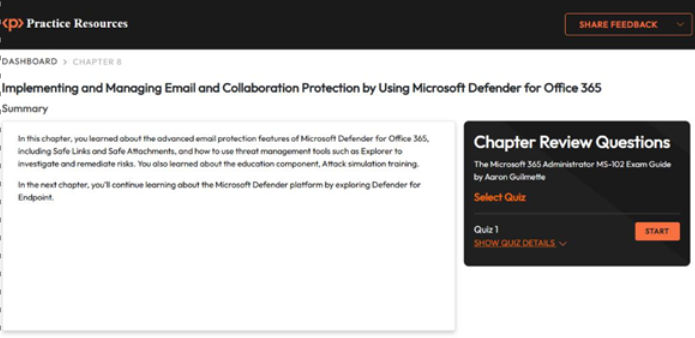
Figure 8.33 – Chapter Review Questions for Chapter 8
Once ready, start the following practice drills, re-attempting the quiz multiple times:
Exam Readiness Drill
For the first 3 attempts, don’t worry about the time limit.
ATTEMPT 1
The first time, aim for at least 40%. Look at the answers you got wrong and read the relevant sections in the chapter again to fix your learning gaps.
ATTEMPT 2
The second time, aim for at least 60%. Look at the answers you got wrong and read the relevant sections in the chapter again to fix any remaining learning gaps.
ATTEMPT 3
The third time, aim for at least 75%. Once you score 75% or more, you start working on your timing.
Tip
You may take more than 3 attempts to reach 75%. That’s okay. Just review the relevant sections in the chapter till you get there.
Working On Timing
Target: Your aim is to keep the score the same while trying to answer these questions as quickly as possible. Here’s an example of how your next attempts should look like:
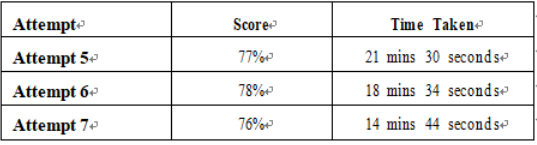
Table 8.2 – Sample timing practice drills on the online platform
Note
The time limits shown in the above table are just examples. Set your own time limits with each attempt based on the time limit of the quiz on the website.
With each new attempt, your score should stay above 75% while your time taken to complete should decrease. Repeat as many attempts as you want till you feel confident dealing with the time pressure.
Leave a Reply