
Organizations using Microsoft Defender for Office 365 benefit from theSafe Links feature, which safeguards against harmful links commonly found in phishing and various cyber attacks. Safe Links actively scans and rewrites URLs in incoming email messages as they are processed, and it also verifies these URLs and links at the time they are clicked in email messages, Teams, and other supported Office 365 applications. This scanning by Safe Links is conducted alongside the standard anti-spam and anti-malware defenses.
Like Safe Attachments, Safe Links has a built-in policy that applies to users who are not members of any other policy and have a Microsoft 365 Defender license.
Note
Remember, if you have configured one of the preset policies, then this will take precedence over any other custom policy for any of the users, groups, or domains that overlap.
To configure a Safe Attachments policy, follow these steps:
- Navigate to the Microsoft 365 Defender portal (https://security.microsoft.com). Expand Email & collaboration, select Policies & rules, and then select Threat policies.
- Under Policies, select Safe Links.
- Click Create.
- On the Name your policy page, enter a Name value for the policy and click Next.
- On the Users and domains page, enter the individual users, groups, and domains to which the policy will apply, and then click Next.
- On the URL & click protection settings, configure the appropriate settings for this policy, as shown in Figure 8.8:
Figure 8.8 – Configuring a Safe Links policy
Under Email, configure the options for managing Safe Links, including URL rewriting.

Under Teams, select to enable Safe Links click-time protection settings.

Under Office 365 Apps, select to enable Safe Links checking for links inside documents. Documents must be opened on a device with Microsoft 365 Apps deployed and the user accessing the document must have an MDO license applied.

Under Click protection settings, choose the tracking user settings, such as Let users click through to the original URL or Display the organization branding on notification and warning pages.- Click Next.
- On the Notification page, choose either Use the default notification text or Use custom notification text. If selecting Use custom notification text, fill out the text area with the custom notification text you want users to see. Click Next.
- On the Review page, review the settings and click Submit.
- Click Done to leave the wizard.
Congratulations! You’ve configured the Microsoft Defender for Office policies!
Configuring Rules
In this section, you’ll examine a number of configuration options that are available for email protection.
Exam Note
These additional settings and configuration options, however, are not related explicitly to Microsoft Defender for Office 365, as they’re part of the default Exchange Online Protection settings. They may, however, show up on the MS- 102 exam (especially as part of multipart scenario questions), so it’s important to familiarize yourself with them.
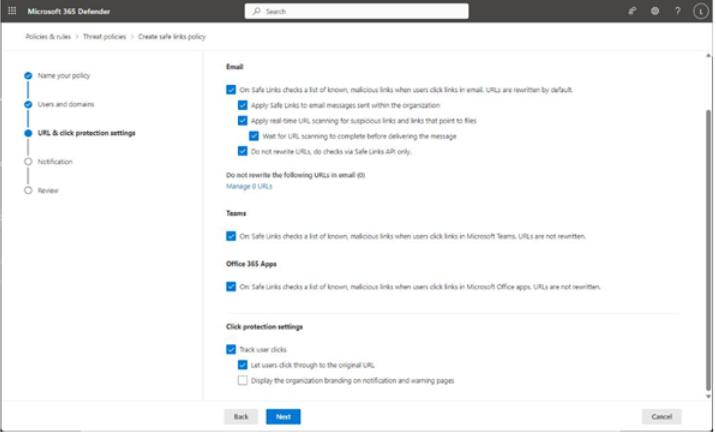
Figure 8.9 depicts some of the Exchange Online Protection standard features and configuration options:
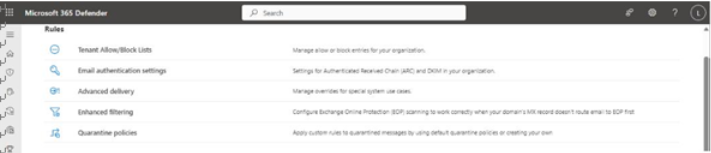
Figure 8.9 – Exchange Online Protection standard features
Let’s quickly go through them so you have an awareness of their usage.
Leave a Reply